A Prayer Plant.

I just wanted to share with all of you one of my most treasured plants. This goes beyond any succulent out there!  We are talking about the Prayer

FullSizeRender 3
via Instagram @houseplantjournal

Plant or know for its botanical name as the Maranta Leuconeura. The reason we call this the prayer plant is when the lights go out at night the leaves fold up and it appears as if it was praying. It is truly a majestical thing to see. This plant is a nice small, compact houseplant, perfect for windowsills! It adapts very well to indoor temperatures, making it a great addition to your room. I attempted to create my own video of this majestic being but failed to do so as my time lampse did not work proeprly. Please stay tuned as I have found this beautiful piece of content via YouTube that will service to showcase to you how truly transending it can be to watch the leaves come alive…

So sit back and relax and enjoy this glorious event.

Le Décoration.

Now lets go forward and discuss how we can now start enjoying our succulents, which brings a whole new meaning behind Succulents In The City. All the plant care, maintenance and watering is only for their needs. NOW – let’s talk about playing with them and actually enjoying them.

** NB: You can’t leave them in their stylish nook of your home all the time, but when entertaining, certainly take advantage of popping them in various places!

La Salle De Bain X The Bathroom:

Bathrooms are fairly predictable. Powder rooms have a mirror, sink and toilet. The main bath typically has a shower/bath and the same. I would recommend using your smaller species such as the singular haworthia or the cacti of your choosing! However, as you might have a porcelain or ceramic base, I would recommend throwing a coaster or simple cocktail napkin as to not scratch your counter top.

La Chambre X The Bedroom:

Bedrooms are cozy and places of sleep and Netflix. Bedrooms have typically three available corners, the fourth being the unavailable door. I would recommend using your larger potted plants such as the sansevieria in the corners as they are low light and fairly contained. Sansavaria or ‘mother-in-laws tongue’ or ‘snake plant’ will only ever grow upwards not like the stupid philodendron selloum which i’m tempted to throw off the balcony due to it’s imposed/entitled to more space than I ways.

La Cuisine X The Kitchen:

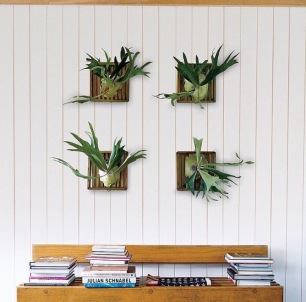
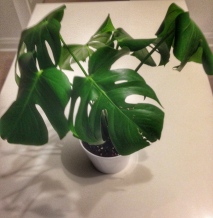
In my first post, I noted that the philodendron – the leafy ivy looking one – is most commonly found on kitchen sills or front hall counters! I have placed mine in a nook on a shelf allowing it to cascade down at it’s on volition like Rapunzel seeking out her Prince Charming. The backsplash of sinks are also ideal spots for smaller plant pots as otherwise they are fairly boring. As a side note, my fiancé uses a larger beaker for his spatulas and whisks and quite fittingly, there is a smaller beaker that I am in the process of propagating baby monstera steams next to it! YAY – NEW FREE PLANT SOON!

Le Séjour X Living Room:

This is where the large suckers belong. The outdoor planters that have been brought in for the purpose of ‘cheap furniture’ and space fillers in our new home that has yet to fully be furnished. The Monstera Delicosa, the Philodendron Selloum and the largest sansavaria proudly stand on display in our living room.

La Salle Á Manger X Dining Room:

Not that I have a dining room, something saved for the home dweller, my dining room table is always exhibiting a medium size plant. This is an excellent location for you to show off your unique plant pot finds from the likes of Dynasty or a flee market where you found some mid-century modern steal!

FullSizeRender.jpg

Evénements Spéciaux X Special Events:

Most recently, my mother and I used succulents as a thank-you gift at my engagement party. I hand picked each and everyone and also repotted all 40 succulents!I thought it would be nice to give everyone a piece of something that represents a part of me. More importantly it allowed for me to share my passion for succulents with everyone around me you know create some buzz. Boy, was the reaction amazing. Instead of giving someone a little trinket I thought the life and growth within the succulents represented something so much more and its something that needs to be nourished and will grow over time. A piece of decoration that anyone can add to any nook or corner within their own home to add a touch of greenery.

Ciao for now…


Plants Of The Air.

Air plants are epiphytic and rootless plants that typically appear grass like and quite simple in appearance. Air plants are fun and come in a magnitude of sizes – small, smaller, medium and rarely large. Once in a blue moon, I have had the pleasure of seeing one bloom and you can too if you pay close attention and nurture these little suckers.

In our home, I have bought air plants already in their containers from the likes of Crown Flora and Urban Gardener.

FullSizeRender
via Instagram @GHASTLYSTEF

Their receptacles can range from hollowed out elephants to cleverly used scientific equipment. My fiancé, being a bit of an ‘outside of the box thinker’ once ordered test tubes and a retort stand from an academic supplier. You do not have to break the bank on the containers if you are diligent to put your thinking cap on. West Elm, CB2, Ikea and other home decor stores offer a wide range of options from $2.95 to skies the limit.

Epiphytes are plants that require no soil and usually nest themselves in nooks and crannies of their natural habitats such as the break where a branch stems from the ‘main component’ of three (completely unscientific description but I’m a BComm so whatever!). Orchids are epiphytes. This is why you usually see orchids sold in wood chips instead of soil. Equally so, the staghorn fern is an epiphytic plant.

You will see the later in prevalence on Instagram – use #staghornfern ( there are 6K photos under that hashtag) see for yourself. The staghorn fern resembles a hunters trophy and is wildly unique. If you do your diligence and research, you can witness these become complete monstrosities. Equally so, they are available in small domicile size. Most recently, my mother forwarded pictures from Plant World in Etobicoke. They are quickly becoming quite trendy, so get on board!

So, as you can now tell, epiphytes and air plants do need to be rooted in a traditional potted sense. You can mount them on placks, situate them freely in crystalware or leave them on the table. Beware of cats and small children thinking of these hand size and paw size plants as toys for their pleasure/amusement.

FullSizeRender 3
via. Instagram @GROWYOUROWNPLATE

The most important plant care of an epiphyte is how to appropriately water them as that is how they absorb their nutrients. Soil potted plants have the luxury of a ‘reserve’ of sorts being firmly rooted in their respective beds. However, the air plant sits lonely in solitude and at the mercy of your care.

Looking after my air plants has exhibited how absurdly dry our home is!

How To Water:

  • Pull out air plant specimen from it’s home and plop in warm water for 20-30 mins every few days depending on humidity levels in your abode.

OR

  • Alternatively, mist the air plant with a stylish mister (available at CB2, Crown Flora, Etsy…) OR hideously ugly carafe from Dollarama (enjoy it’s ugliness – it’ll make you smile if you cave into your inside joke as you save your pennies for a $42 brass mister).

**NB: With regards to the latter watering option, I would warn you that spouses and roommates who reside with you will be might ticked when you turn the floor underneath the plant in the wild water kingdom. Proceed with caution.

Lions + Tigers + Bears OH MY.

IMG_4651
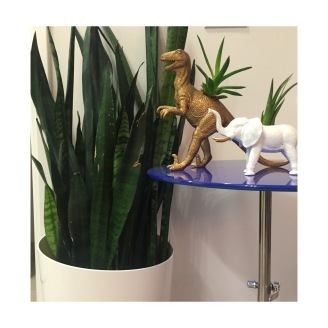
I am very excited for this mini project as we all love chakas (or most of us do anyway) and I especially enjoy filling them with air plants or even a succulent or two. It also gives you a chance to ask for a little help from a special someone who enjoys an excuse to use a hole saw drill. Also you are able to pick your favourite animal and go forward. This project will not only be fun to fill up spaces within your home but is also a great gift idea that adds a personal touch to someone’s home or even office. But be careful as you will need to use a hole saw drill… to create these little amigos.

What you need:

Hollow hard plastic toy animal

Hole Saw Drill

Air Plant/Succulent(s) – If using a succulent you will need a bit of soil

*Optional Coloured Paint / Spray Paint

Mini Rocks

Instructions:

As you will see through our images we created a white elephant with an air plant, but you are able to use any animal of your choosing you just need to insure it is hollow and has room big enough for a hole 3 inches in diameter. Using a hole saw drill into the centre point of the body (usually closer to the back of the animal) creating an opening and revealing the hollow cavity for your succulent.

*Optional: Ensure you are in an open area (so you are not inhaling toxic fumes) and over a piece of cardboard feel free to paint your animal any color of your choosing. I always prefer white for a sleeker appearance and also to ensure it will go well with the décor of any room or office. You must make sure you completely cover every crevice and crack of the animals body. This step allows for the animal to transform into a decorative piece.

Once completely dry it’s time to put your game face on. I truly like to make this part as easy as possibly that is why I choose to go with an air plant versus a succulent but both are manageable. When using a succulent begin with a thin layer of rocks to provide drainage for your greenery. Insert the succulent inside the hole you have drilled packing it will soil or sand around it so it fits snug inside the hole. You can complete if you like as an extra finishing touch some moss into the opening of the drilled hole in to secure the succulent.

Now crack that bubbly and take your gloves off and be proud of your work. Find the perfect place to perch your new animal. They will keep you company and add a touch of greenery to your everyday life.

Care:

Ensure that you are spraying your air plant or succulent when the earth or even the plant itself feels dry. I tend to check every 3-4 days to make sure my succulent or air plant is hydrated.

I have also added a video link from JucyKits.com in order to clarify any concerns with caring for your succulents and theres more useful information on watering already created terrariums.


The Art Of Propagation.

101 In Creating Plant Babies:

This is an advanced skillset that no amateur home gardener should be fearful about because if you mess it up… everything’s going to be ok. Also, this is a really fun way to learn more about your plants anatomy and their environmental needs as you will see growth quite visibly.

FullSizeRender
I have propagated two plant species at home and one of them numerously with success. The latter… still waiting and watching. Google provides this simple explanation of the practice of propagation: to breed specimens by natural process from the parent stock. Therefore, all you need is a healthy and mature plant and to learn where you take ‘cuttings’ from to harness new growth. The monster delicicosa is an extremely easy and great beginner plant to begin learning how this simple process works.

First, you must observe your mature/adult plant and isolate which shoot you will be cutting loose. Second, you need to find a suitable container and window ledge so that your cuttings may re-root. Remember, the MonsteraFullSizeRender 3 
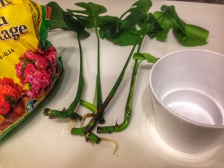
is a member of the Philodendron family, so the propagation method is the same. Keep in mind that I am an amateur gardener and not a trained botanist, so my verbiage may be contradictory. However, I have had success using these techniques (and I have saved a ton of money sharing my babies with others).

Phase 1:

  • Isolate branch of monstera and cleanly chop of branch with 3-5 shoots.
  • Further deconstruct the branch into matching 3-5 shoots with T shapes at bottom of stem (if leaf is consider top)
  • Place together in warm water and leave with ample light for photosynthesis to occur.
  • Pay close attention to growth. White roots will appear within 1-2 weeks of cutting if nurtured properly. Make sure these roots are submerged completely in water.

Phase 2:

  • Procure pot, soil, plant stakes and miracle grow or suitable fertilizer.

NB** Pot must allow for growth. It may appear too big, but in order not to ‘shock’ the plant by repotting too soon, simply choose 1.5-2 times bigger than you wish.

  • Once three weeks or ample growth of those white stringy roots have appeared, lay out cuttings on a table.
  • Place soil in pot leaving room to stake these T shaped cuttings. Attempt to keep cuttings centered, but keep in mind that there will be a little room to adjust.
  • Fill gaps in soil with more soil and gently pad down with back of spoon.
  • (Optional): If needed, place stakes to hold up/prop up cuttings. This is an interesting way to shape your monstera down the road in 6 months – 1 year.
  • Water aggressively with a water/fertilizer mix. Place by window and watch.

Although the propagation process might seem like a lot of work, it is no more complicated than planting new purchases in a planter or maintaining any other plant. I found also more satifisfaction is derived from the process due to a feeling of accomplishment: “I made those babies from that baby of mine.” Once again, a celebratory toast is almost always necessary… or two.

The Great Gatsby.

Happy Sunday everyone! Today I embarked on a new challenge; the challenge is to create a DIY floral arrangement.  I had to call in an expert of mine to show everyone how it’s done! The basic steps for any beautiful display are; building the basic structure or line, adding points of focus and completing the arrangement with filler for a gestural finish.

I had the pleasure of calling in my lovely Zia Maria who took a course at the Canadian Institute of Floral Design of Toronto and now has a certification in floral design.  Boy oh boy does she come in handy and is able to guide us through this unique process.  Succulents in the City thanks you for your assistance and knowledge in this process and hopefully some of you guys will appreciate this spin off of my blog.

What you need:

1 ceramic pot

1 block of floral foam

1-bunch purple daisy chrysanthemums

1-bunch white button chrysanthemums

2 bunches wax flowers (1 purple, 1 white)

1 bunch leather fern

Scissors

Floral Knife

Plant Sheers

IMG_4440

Prepare Vessel:

  • Cut the dry floral foam to fit snuggly inside vase
  • Place floral foam in water until saturated – this will sustain the life of your arrangement
  • Insert saturated foam inside vase

IMG_4473

Flower Preparation:

  • Please not that all stem endings should be cut on a slant for better water absorption and inserted into the foam approximately 1 inch
  • Shave off foliage from all stems before inserting
  • Faces of flowers must face the outside in order to create a round shape


The Basic Structure:

  • Using the leather fern create a uniform collar touching the outer edge of the vase, this will act as the base of your arrangement
  • The focus on creating the perfect structure is to ensure that the skeleton of the arrangement follows a rounded shape (Note: this is the most vital step in creating the arrangement, please refer to photo):

IMG_4479IMG_4482IMG_4487

  1. Place 1 purple daisy straight in the centre of the foam
  2. Place 5 purple daisies to form a pentagon shape around the base of the vase above the fern
  3. Place 3 daisies around the central flower (step 1) to form a triangle
  4. Place 3 more daisies in between the first triangle (step 3) to create second triangle – this shape will depict a star shape
  5. Place 5 daisies in a zig-zag shape in-between the pentagon (refer to step 2)

Points of Focus:IMG_4490

  • Insert white button mums to fill space between daisies – assorted throughout arrangement
  • Insert additional purple mums throughout arrangement
  • Insert white mums throughout arrangement
  • Spot the wax flowers both white and purple in a uniform way throughout arrangement

Gestural Finish:

  • IMG_4493
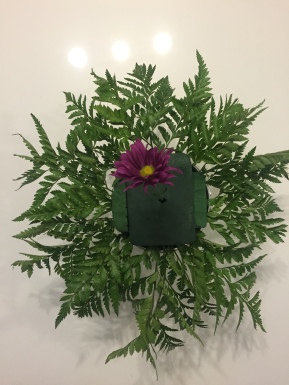
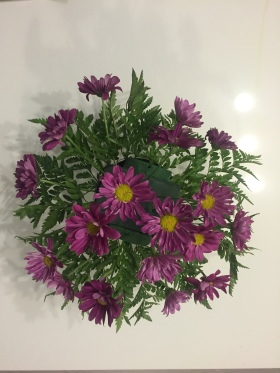
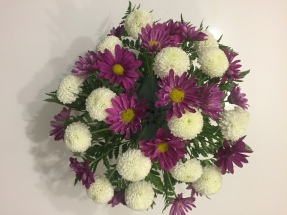
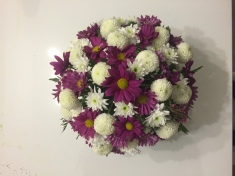
Ensure there are no gaps within the arrangement and ensure floral foam is not visible
  • Insert additional pieces of leather fern to cover gaps and floral foam


Ta- Da: Now go and open a beautiful bottle of bubbly and enjoy your hard word + beautiful arrangement

IMG_4504